
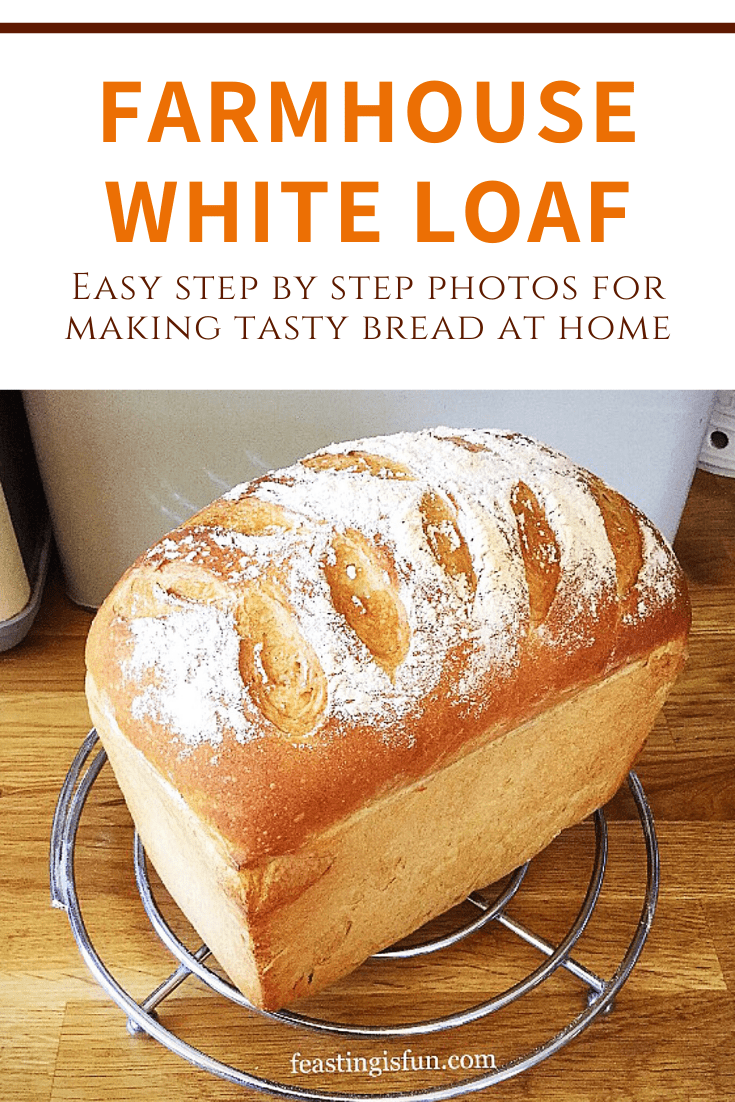
Is there anything better than the smell and taste of freshly baked bread? This Farmhouse White Loaf is utterly delicious. If you’ve never baked bread before, read on and let me encourage you to give it a go.

Baking your own bread is such a rewarding experience. From a few simple ingredients, mixed together, the bread literally grows before your eyes.
This Farmhouse White Loaf is the perfect recipe to start with, if you have never made your own bread before.
You will need a loaf tin to bake your bread in. I recently reviewed a British company, that sells British manufactured bakeware you can read it here.
British Bakeware sell a range of loaf tins, my favourite and the one used for baking this loaf is the 3lb deep farmhouse loaf tin.
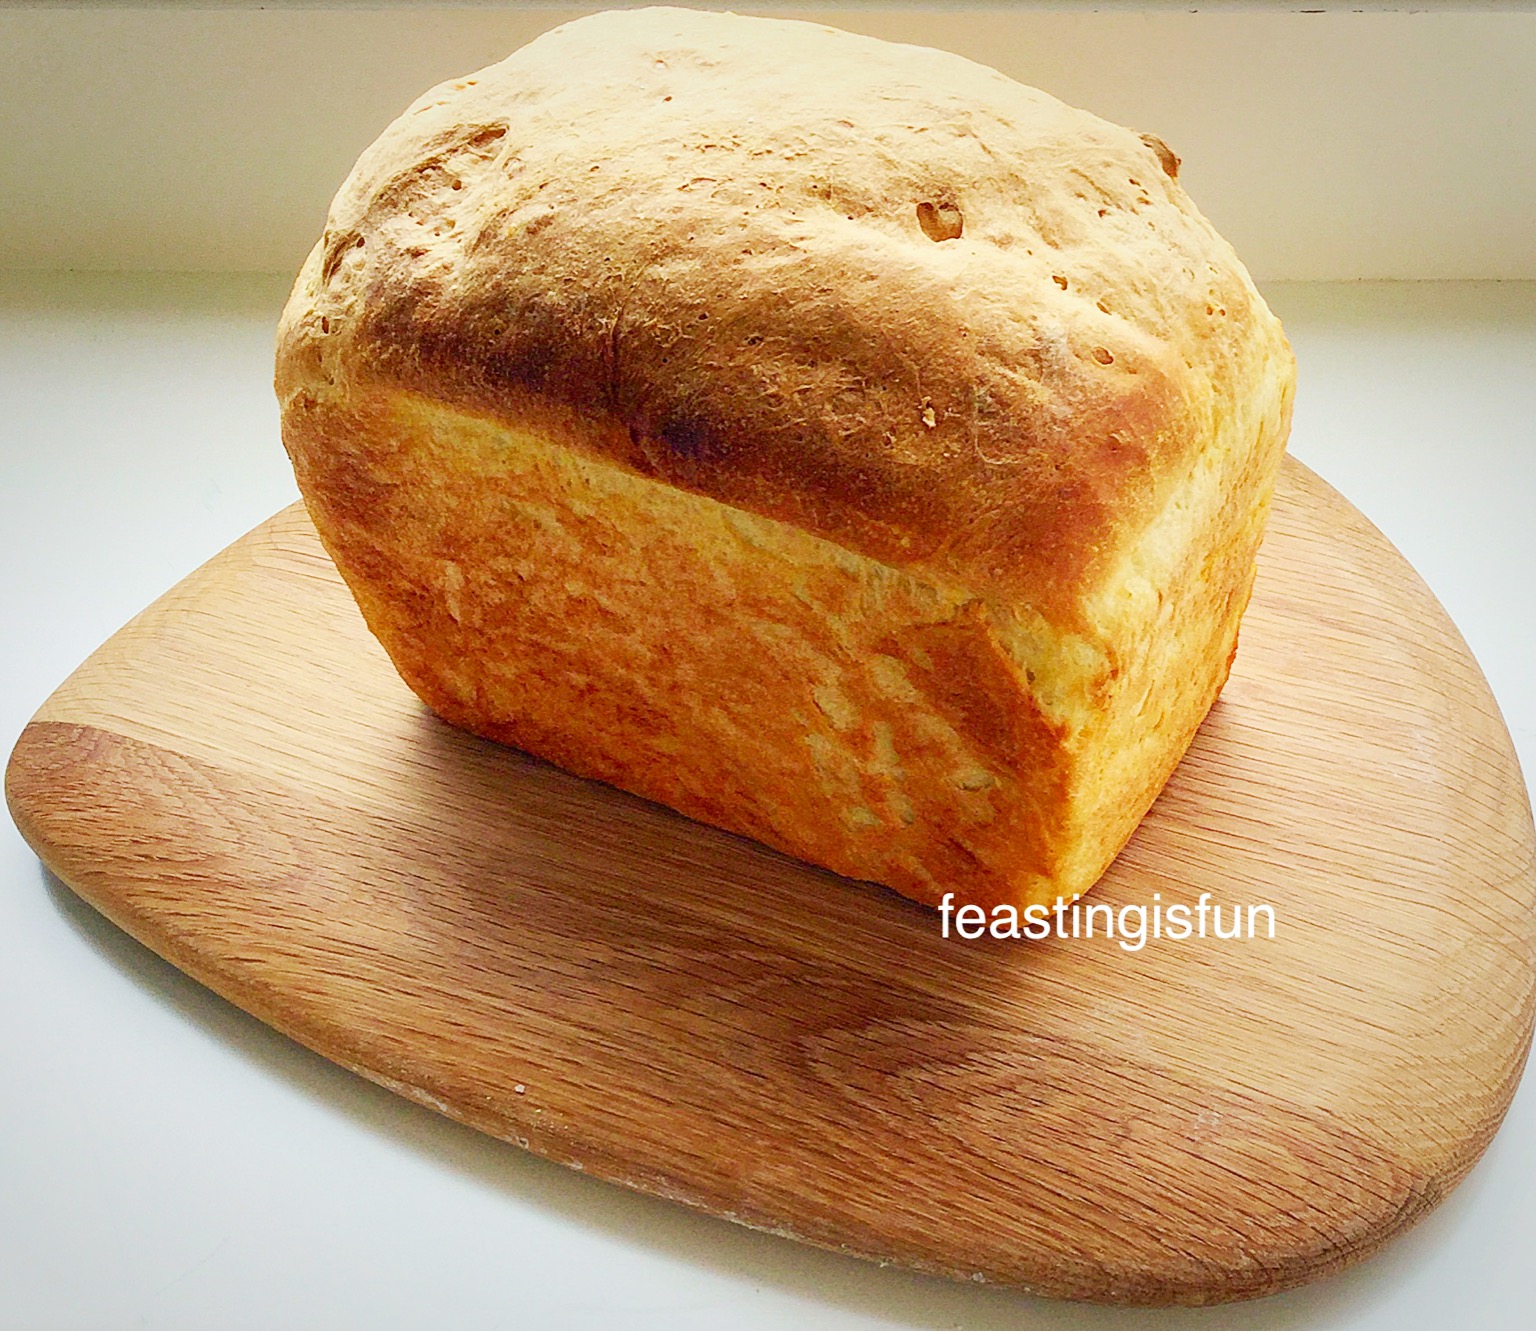
Farmhouse White Loaf – Bread Baked In A Regular Oven
The advantage of having a deep loaf tin is, no muffin topped loaves. In the past I have baked bread in tins that weren’t as deep as this one and the bread rose and billowed out, like a mushroom. I’d have to cut away the sides of the bread, where it had stuck to the outside of the tin. Not they way to bake a great looking loaf!
The instructions given below for making this bread are, by hand (which everyone should do at least once in their lifetime), or using a stand mixer/bread maker to carry out the mixing, kneading and knocking back.
Personally I prefer bread baked in the oven. I have baked many a loaf in a bread maker, however, I never seem to get the gorgeous, crunchy crust, that I achieve with an oven baked loaf. Plus bread maker bread is always a little soft for my liking and there’s the inevitable hole in the bottom of the loaf where the mixing paddle is!

Bread As It Should Be – Without Unnecessary Additives
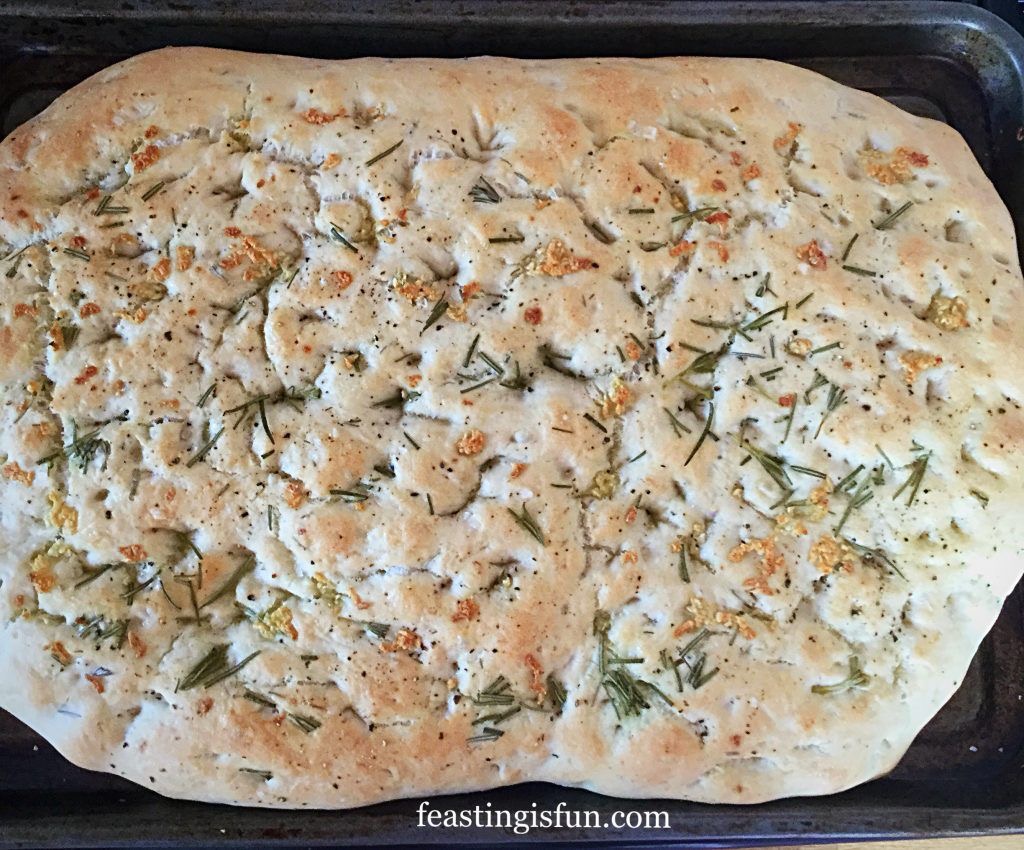
If you like baking bread in a bread maker I am most certainly not going to judge you. Any bread baked at home is infinitely better than plastic wrapped, pre-sliced, mass produced bread! Aside from speciality breads like my Tomato Thyme Garlic Focaccia, bread should contain nothing more than flour, water, yeast, salt, water and a little oil or butter.
Read the ingredients on the back of a shop bought loaf and you will be amazed at all the additives.
Baking your own bread is easy, once you get into a routine. Even when baking by hand, it still only takes 20 minutes, hands on time, to get a loaf ready to be baked. Once you taste real, homemade bread, it’s hard to go back to the bought stuff – that said, I’m a realist and I usually have a bought loaf stashed in the deep freeze for days when my body is playing up (see here). So I won’t judge!!
Helpful Bread Making Tips
Just a quick tip: if you do start to bake bread regularly, it can pay to bulk buy your bread flour. I use organic flour that is stone ground, from Shipton Mill currently I buy it through Amazon UK using their subscribe and save, although Shipton Mill now have their own online shop. Buying in bulk, through Amazon UK, 5 x 2.5kg bags, means that we eat good quality, organic, stone ground British flour, for about 60 pence a loaf!
While I love baking with fresh yeast, the shelf life is very short, so I have used 7g sachets of fast action dried yeast. Alternatively, if you do use fresh yeast, simply double the quantity stated for dried.
Recipe: Makes 1 Large Farmhouse White Bread Loaf
500g/1lb 2oz Strong White Bread Flour – I use Shipton Mill organic white flour
1 x 7g Sachet Fast Action Dried Yeast – I use Allinson Easy Bake in the green packet or pot
1tbsp Honey – alternatively use 1tsp regular sugar
320ml/11oz Tepid Tap Water (approx body temp)
7g Salt – I use Maldon Sea Salt
1 tbsp Rapeseed Oil (Canola Oil) – I use Kentish Oils alternatively add 25g/1oz of unsalted butter.
Farmhouse White Loaf – Making The Bread Dough
The ‘bowl’ is either a large bowl, with which to mix the bread by hand, or the stand mixer/bread maker bowl.
For all methods:
Pour the water into the bowl. Add the honey and yeast. Swish about with clean fingers to activate the yeast.
Add the flour on top of the liquid.
Add the salt and the oil/butter.
Bread Maker
If using a bread maker, set to dough cycle and start the program. Once the cycle is completed re-start for 2 minutes. This ‘knocks back’ the dough. Then remove the dough, shape into an oval/ball and place into a buttered loaf tin. Cover with a damp cloth, leave in a draught free place until doubled in size.
Stand Mixer – with dough hook attachment
If using a stand mixer, attach the dough hook and mix on medium speed until all the ingredients are combined. Continue to mix for a further 5 minutes, until the dough is smooth and elastic. Stop mixing. Scrape the dough from the dough hook and combine with the dough in the bowl. Form into a ball, place back into the bowl. Cover with a damp cloth and leave in a draught free place until doubled in size (approx. 1hour). Once doubled remove the cloth, mix for 2 minutes on medium speed using the dough hook. This ‘knocks back’ the dough. Remove the dough and form into an oval/ball shape, place into a buttered loaf tin. Cover with a damp cloth, leave in a draught free place until doubled in size.
By Hand
If hand mixing, bring all the ingredients together with your hand until they form a doughy mess! Place this dough onto a very lightly floured worktop. Knead for a good 10 minutes. If the dough gets sticky, keep kneading and working it – if you add extra flour the finished bread will be dry. After a good 10 minutes kneading, the dough should have a smooth elasticity. Place the kneaded dough into a buttered bowl, cover with a damp cloth and leave in a draught free place until doubled in size, 1-2 hours.
Shaping The Dough Ready For The Second Proof
Ensure the area that you are shaping your dough is draught free.
First of all lightly dust the work surface with flour
Tip out the dough, from its bowl, so the top of the dough is directly in contact with the worktop. This will help as we start to build tension within the dough.
Lightly flour your hands and pull out part of the sticky dough, then press it into the centre of the dough, as seen in the photos below.
Continue this process all the way around the outside of the dough until you have a smooth, rectangular shape, with no sticky sides.
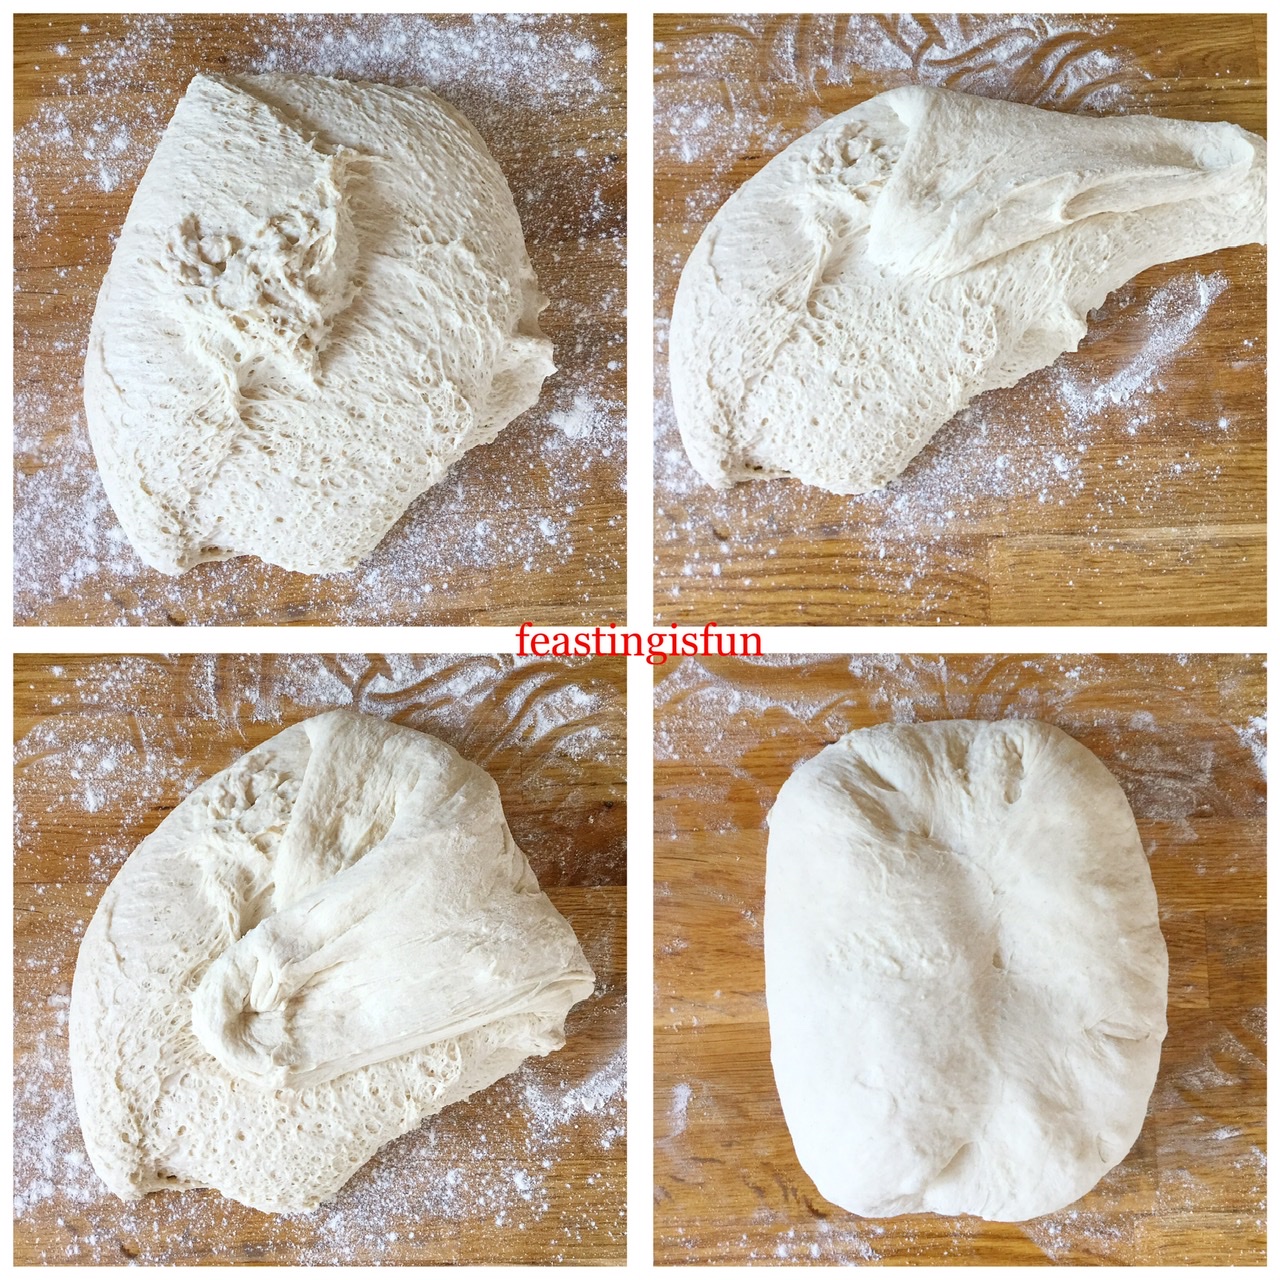
Shaping The Loaf
Using your fingers, lightly press the dough out into a square shape, roughly the same width as the length of your dough tin.
Fold the top third of the dough onto itself and then repeat with the bottom third of the dough, pulling it so that it overlaps the first fold.
Flip the folded dough over and tuck in the top and bottom to create an oval shape.
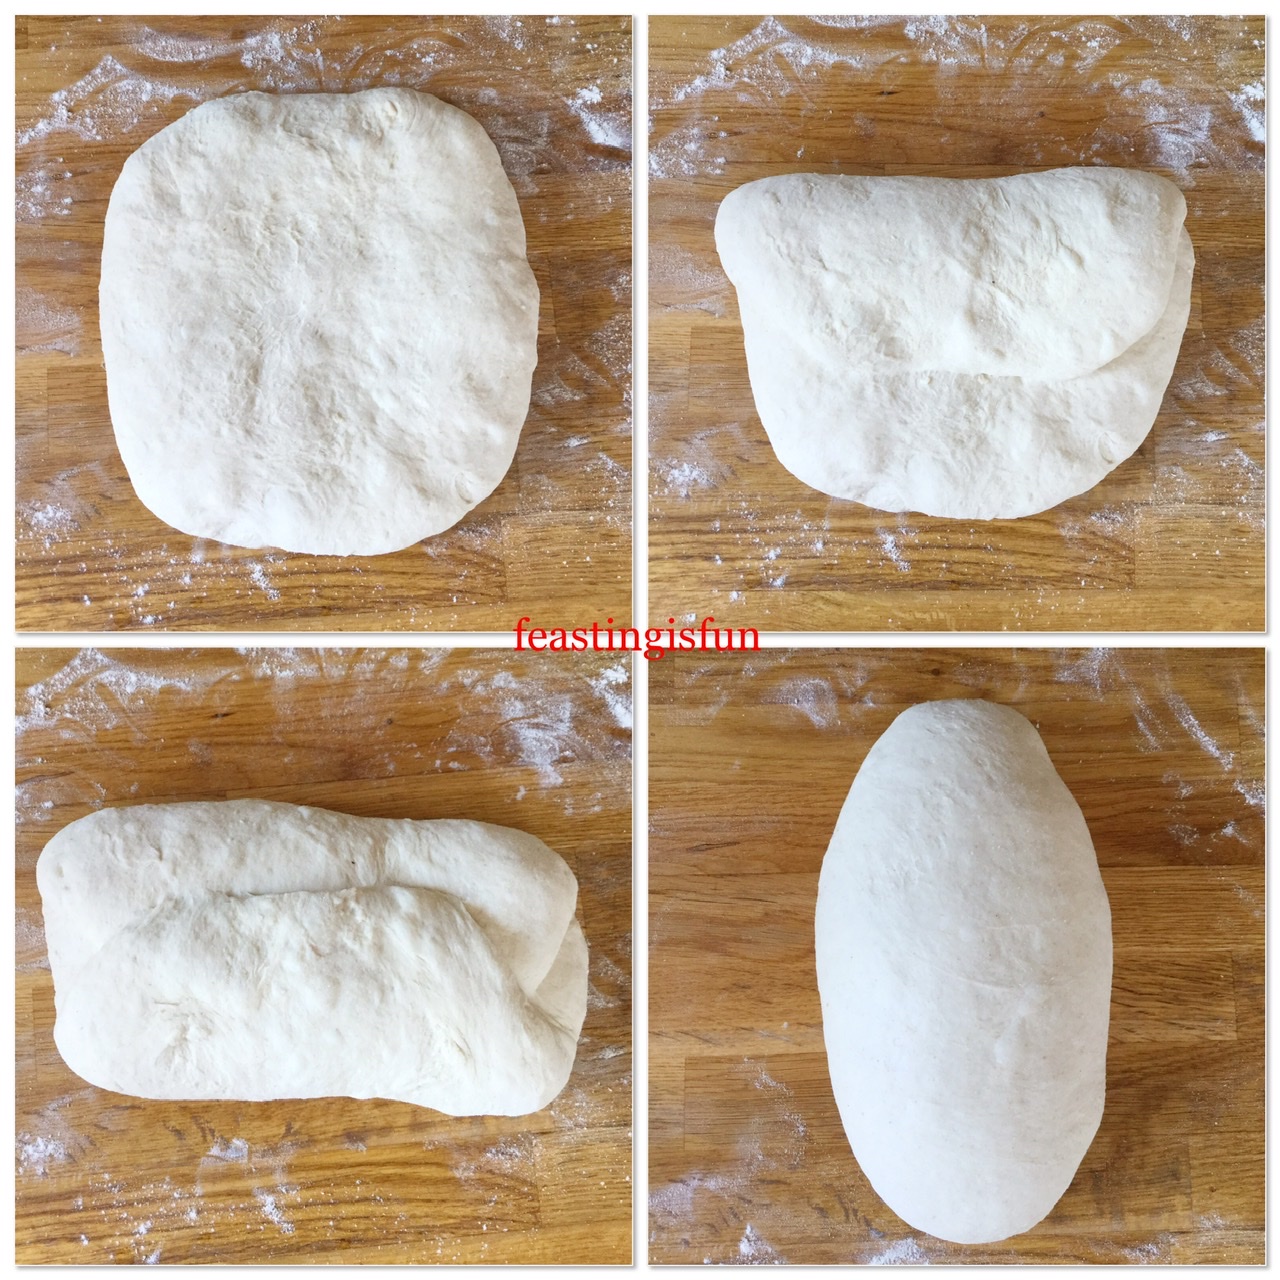
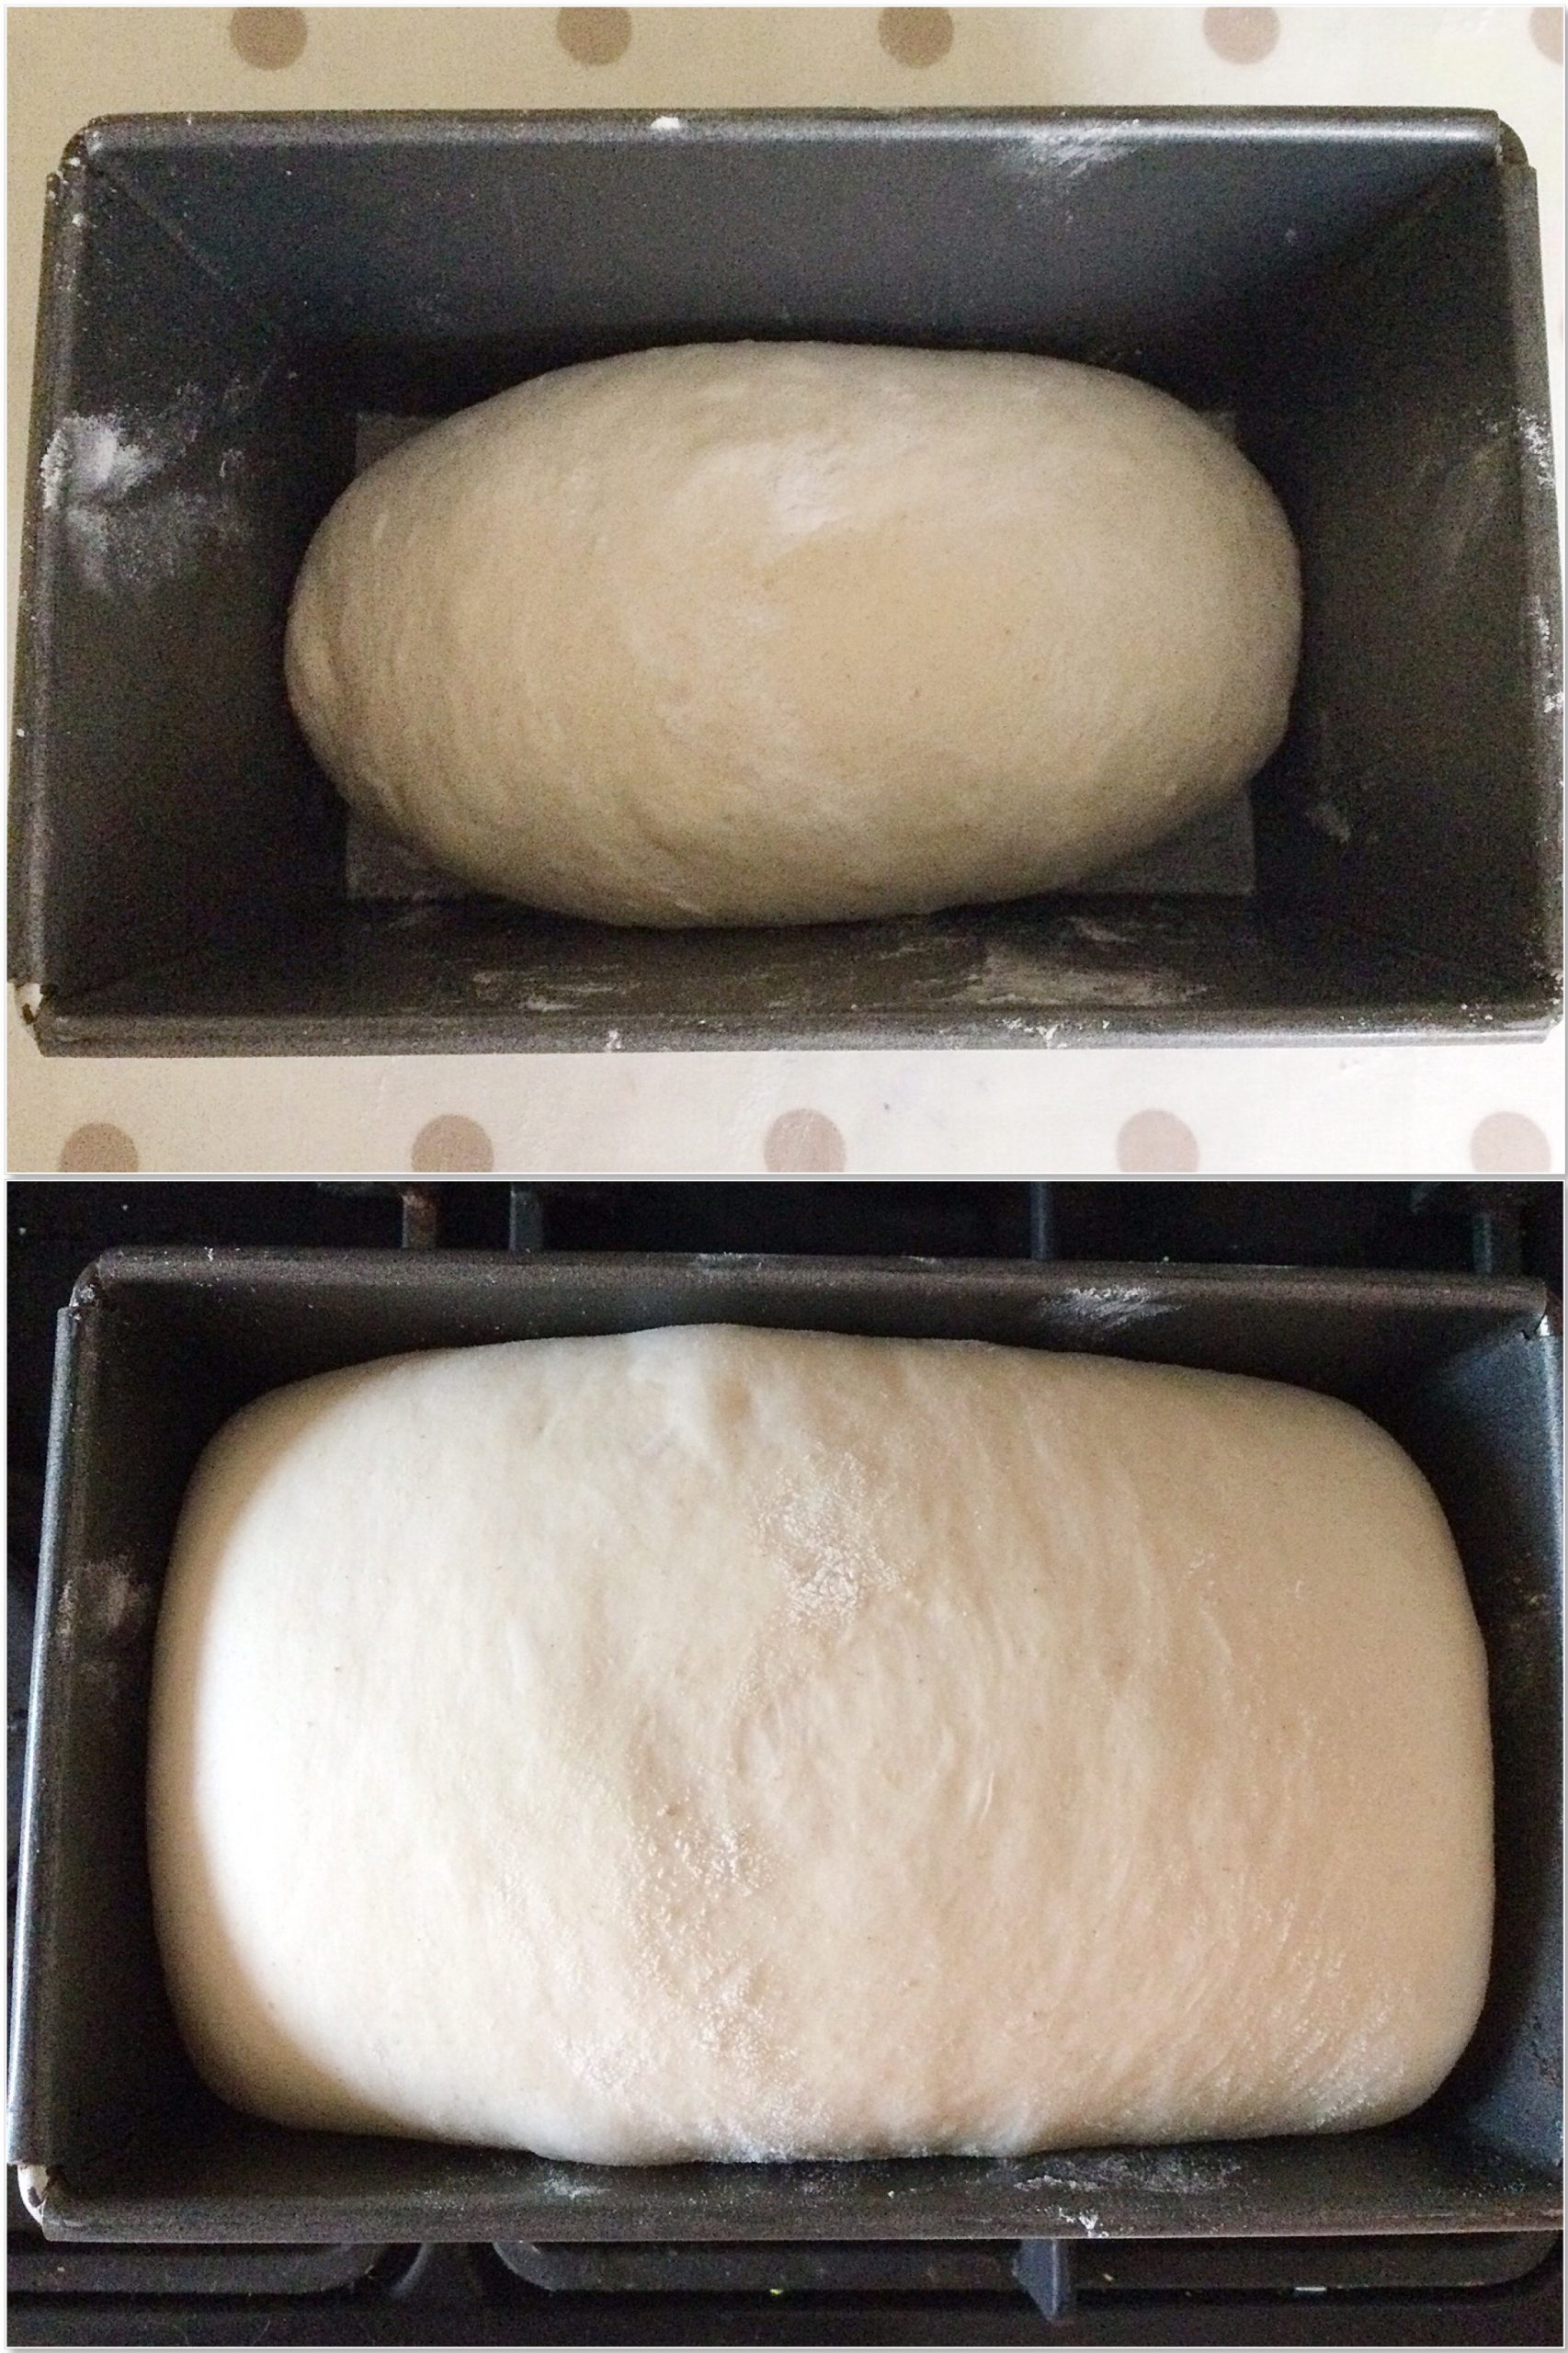
Place the shaped dough, with the seams underneath, into the loaf tin.
Cover with a clean tea towel and leave in a draft free place until doubled in size.
Baking Your Farmhouse White Loaf
10 minutes before the dough is ready to bake, preheat the oven to 220C/200C fan, gas mark 7, 425F. Also, place an inch (2.5cm) of water in a container and place on the bottom of the oven. This will create steam which allows the bread to rise more (known as oven spring ) before forming a crust.
Also, if desired, score the loaf before placing in the oven.
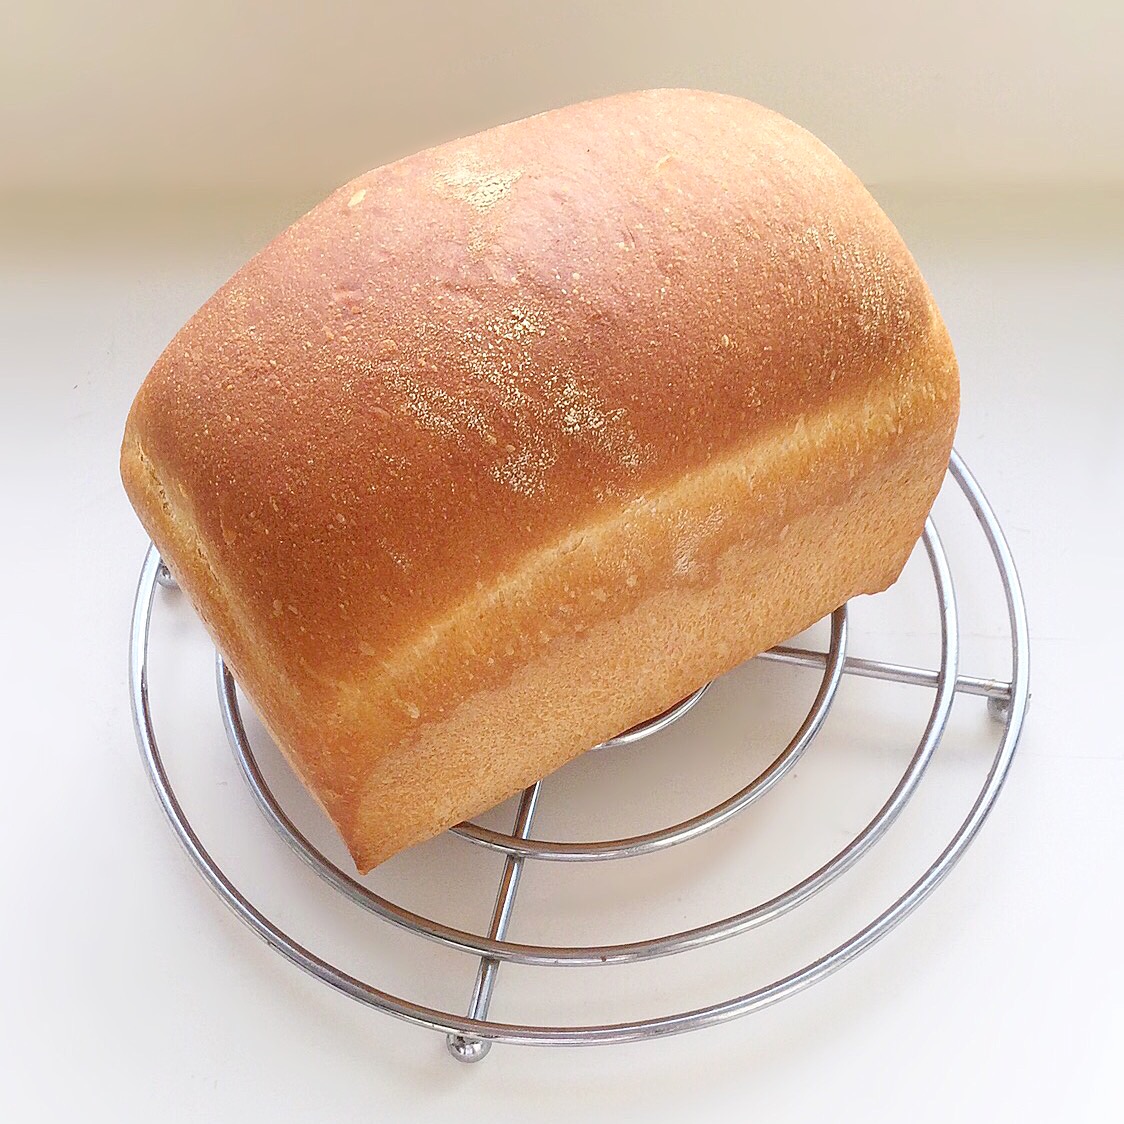
Place the loaf tin into the middle of the oven. Bake for 30 – 40 minutes. Tip the loaf out of the tin.
The bread is cooked when it has a deep golden crust and sounds hollow when rapped on the base with your knuckle.
For an extra crusty loaf place the bread directly on the oven shelf and bake for a further 5-10 minutes. Remove from the oven and place on a cooling rack.
Enjoy the wonderful aroma of baking bread as it fills your kitchen. That alone is worth baking this bread for!
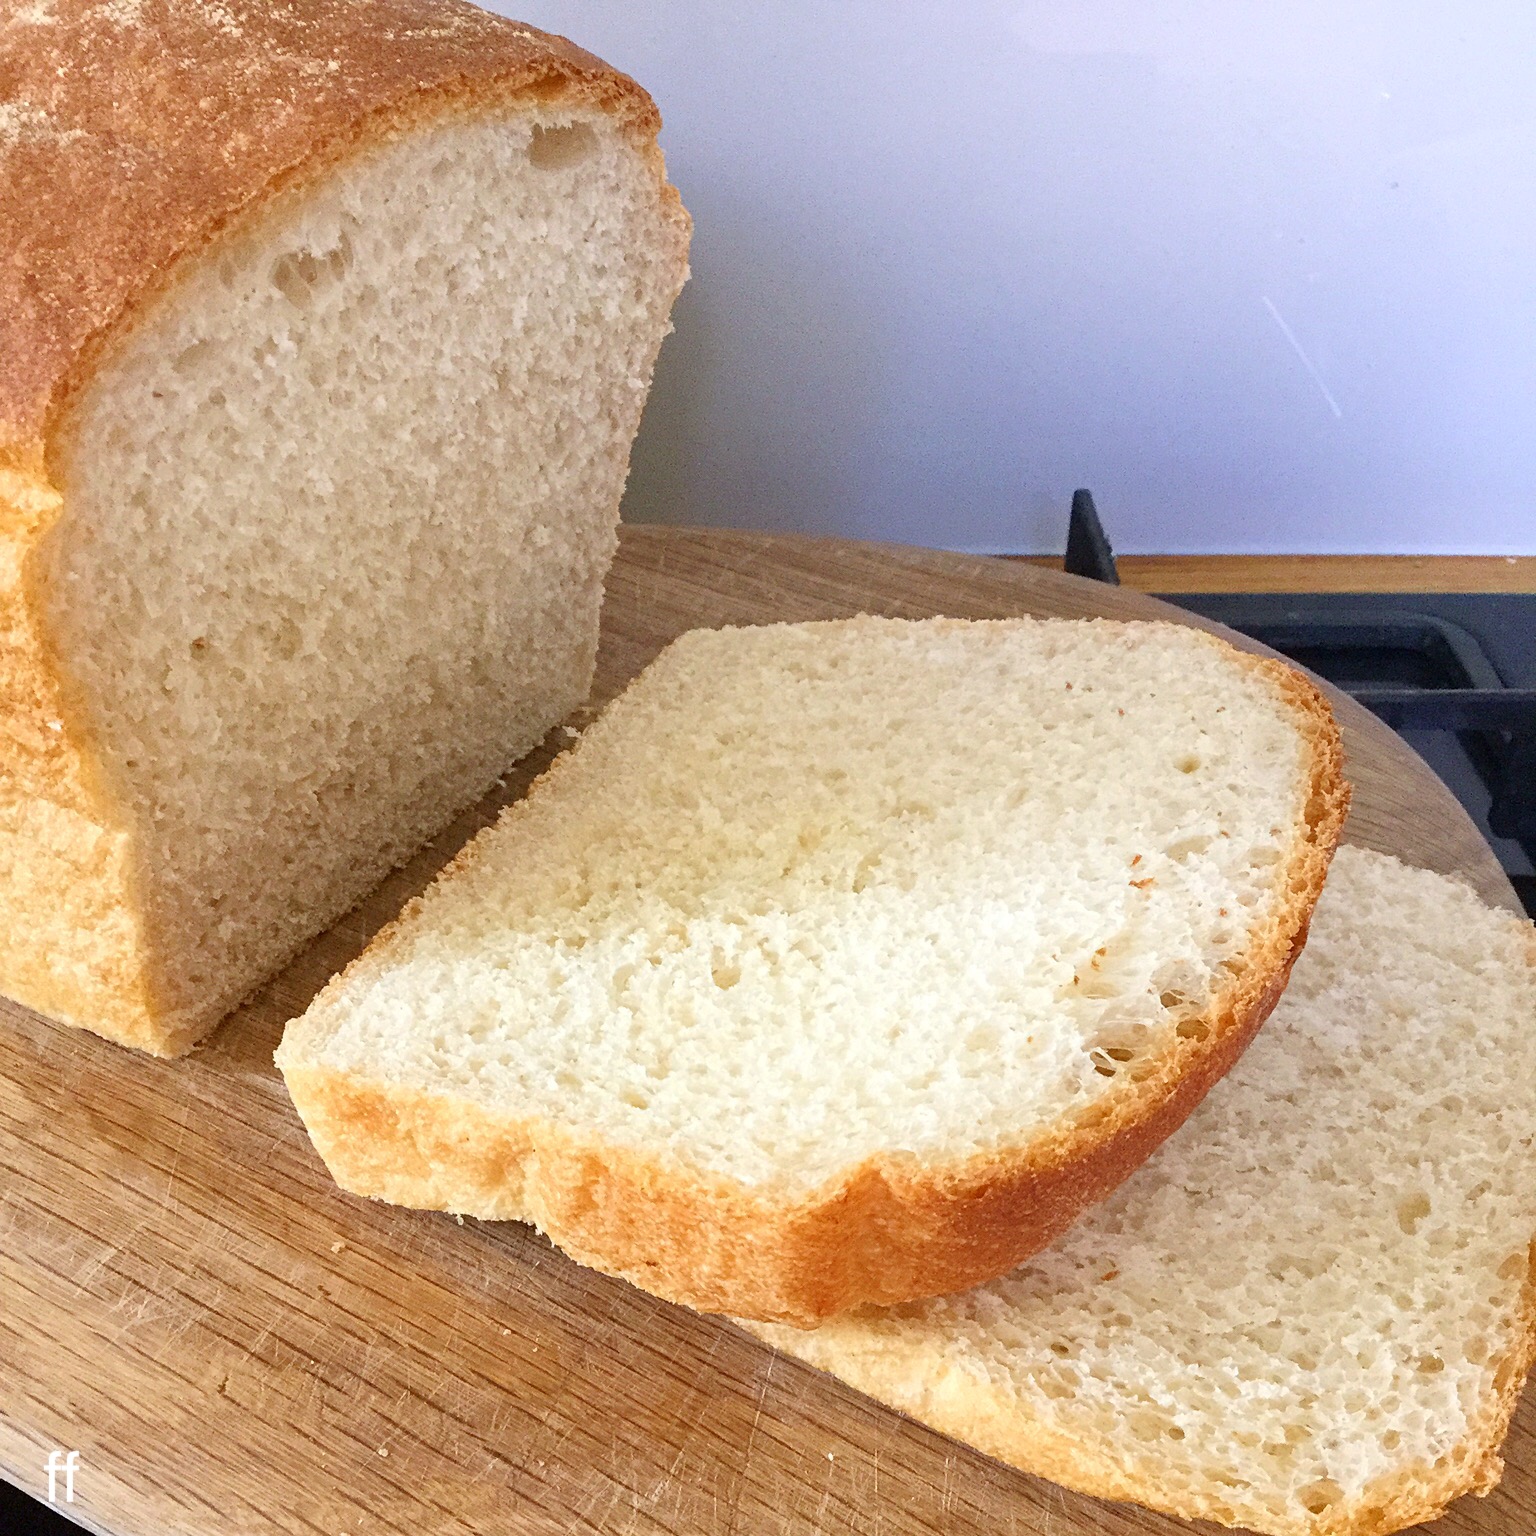
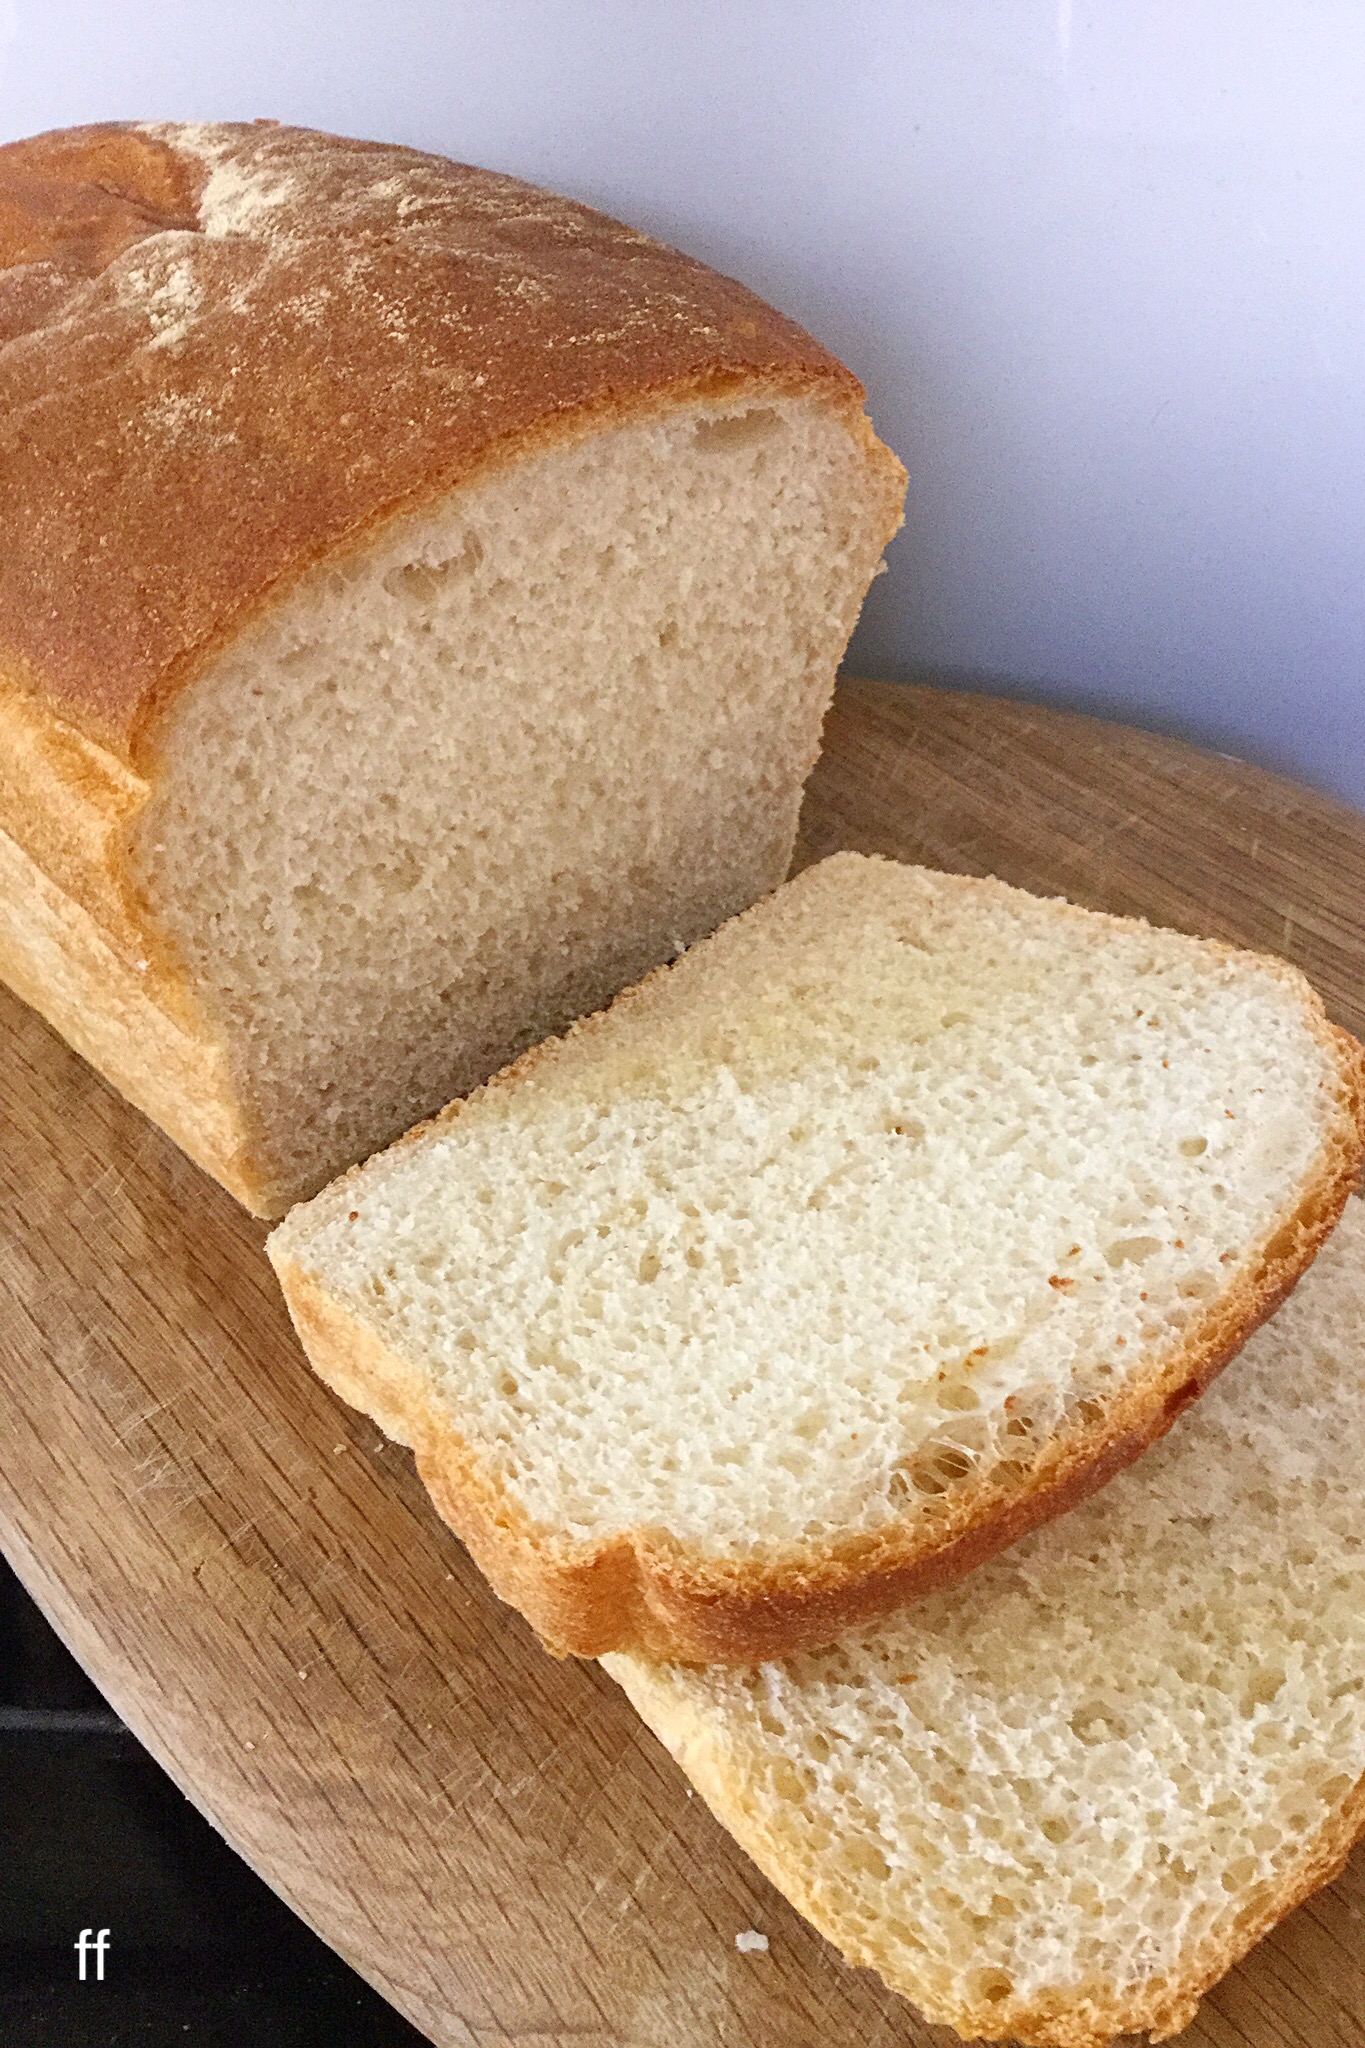
Enjoying Your Farmhouse White Loaf At It’s Best
Allow the Farmhouse White Loaf to cool completely before slicing. I know it is sooo tempting to tear into the hot, freshly baked loaf, but if you do the bread will all squidge (is that a word??) together and be very hard to slice.
Give yourself a big pat on the back for making a cracking loaf!
You deserve it.
This was not a sponsored post. All opinions are my own and recommendations for products are purely from my own personal experience.
Bread is a staple in so many homes, treat yourself to a home baked loaf and I promise you won’t regret it.

Here To Help You Bake The Perfect Bread
I do not presume to be an expert, however, I have baked a fair few loaves over the years. Please ask if you are having any problems, need guidance or reassuring?
Either leave a comment or tweet (@sammiefeasting) me a question. I will do my very best to help.
If you have enjoyed this recipe for Farmhouse White Loaf you may like to try these:

Garlic Rosemary Focaccia Bread
While baking bread is not only a satisfying and tasty experience, it can also work out much cheaper than buying a standard loaf at the shops. Also, you know exactly what has gone into your home baked bread. And, the more bread you make, the better you will become at making it. As you become confident baking a white loaf you can get creative and try other bread recipes. Although, I should issue a warning, bread making can become addictive!
So, whatever you are making, baking and creating in your kitchens, have fun preparing and sharing your feast.
Sammie xx
No part of this post may be reproduced or duplicated without the written permission of the owner. Please see my Disclosure Policy.
Can I substitute the white bread flour with wholemeal bread flour without changing anything else?
Hi Sam, wholemeal flour absorbs more water than white. I suggest that you try this recipe https://www.feastingisfun.com/lighter-wholemeal-loaf/ Please let me know how you get on?
Hi, can you tell me how many teaspoons in a packet of yeast? I have a jar that I need to measure.
Thank you.
Karen
Hi Karen, one teaspoon of dry, easy, active yeast is about 5G. So I’d recommend one and a half teaspoons if the recipe calls for a sachet, or 7g. I hope this helps? X
Hi Sammie,
I am 68 and just baked my first (successful) loaf thanks to your recipe, which was the lighter wholemeal loaf. This time I wanted to give the farmhouse white a go. The only thing I struggled with was kneading the dough as it was so sticky! I found it really difficult without adding more flour, but, as you said, it made the loaf a bit drier. Any more tips on this? or do you have a video showing how to knead this recipe? That would be great. Many thanks.
Hi John, thank you for your comment. First of all I’ll solve your issue; different batches of flour can vary in the amount of water they absorb. So, I would reduce the amount of water by 10-15ml and start the kneading process, adding in more water if the dough is not stretching out and hard to knead. Secondly, I shall be making bread this week and I will take photos of each stage of kneading by hand. I will then either add them to this post, or more likely create a new blog post on how to knead bread by hand, which I will then provide a link to in all of my bread recipes.
As an aside, if you keep working a sticky dough, without adding extra flour, it will eventually become a smooth, elastic dough that is a joy to shape! It’s rather fun to see! I hope this information helps and happy baking. Sammie x
Thank you. Would you recommend those non-sticky mats for kneading on, which I have just found out about and sent off for?
Hi John, I knead my bread on both a wooden kitchen worktop or am oil cloth covered table. As long as you have a flat surface that can be easily cleaned that should suffice. However, I do use a large non sticky mat for rolling out pastry, to protect the worktop when I’m cutting the pastry. I hope this info helps?
My favourite bread recipe turns out perfect every time thank you
Hi Amy, you have made my day! I’m thrilled that you love my Farmhouse White Bread recipe. Thank you for taking time to leave a comment. Sammie xx
Hi just made a loaf, very easy to make BUT I cooked it for the right time, looked great – it sounded hollow, but when I cut it it wasn’t thoroughly cook- should I cook it longer, I suppose it could be my oven. Sorry to be a pain.
Hi, thank you for your comment. Firstly I recommend an oven thermometer as oven temperatures can vary considerably.
Next, how long did you bake your loaf for?
Did you remove the loaf from the tin and place back into the oven for 5-10 minutes?
Also, did you wait for the loaf to completely cool on a rack before cutting it?
If you could send me a couple of pictures of your bread in good lighting that would also help. Send to sammiefeasting@gmail.com.
I cooked it for 45 mins. Did not take it out of the tin and did not put it back in the oven. Still looked good though. Will send photo. Thank you for your help. It is probably just me!
I have baked this bread twice now and it’s been perfect both times! If I wanted to make rolls, would I just form dough balls to the size required (or smaller) for the second prove and then bake when risen?
Hi Laura, I’m so glad that you like this recipe. Yes, you can make this dough into rolls. As a general guide, for shaping and baking, please take a look at https://www.feastingisfun.com/extra-fruity-hot-cross-buns/. Of course you can also make the rolls larger or smaller to your preference. As a tip, if you want softer rolls, rather than crusty ones, place a clean tea towel over the rolls as they cool on a rack. Please let me know how you get on? Sammie x
Simple but elegant recipe. I especially appreciate the images showing the technique for folding over the dough. I had seen written descriptions, and thought this was what was intended, but I wasn’t sure until I saw your recipe. Thank you!
Hi, thank you so much for your comment. I’m glad you’re enjoying the recipe.
Hi, I’m a little confused about the second rise, your instructions say to wait till it doubles.
After I’ve shaped it the loaf is only half way up the pan at most (using the same 3lb loaf tin you use), so doubling it will only bring it up to just under the top of the pan at best.
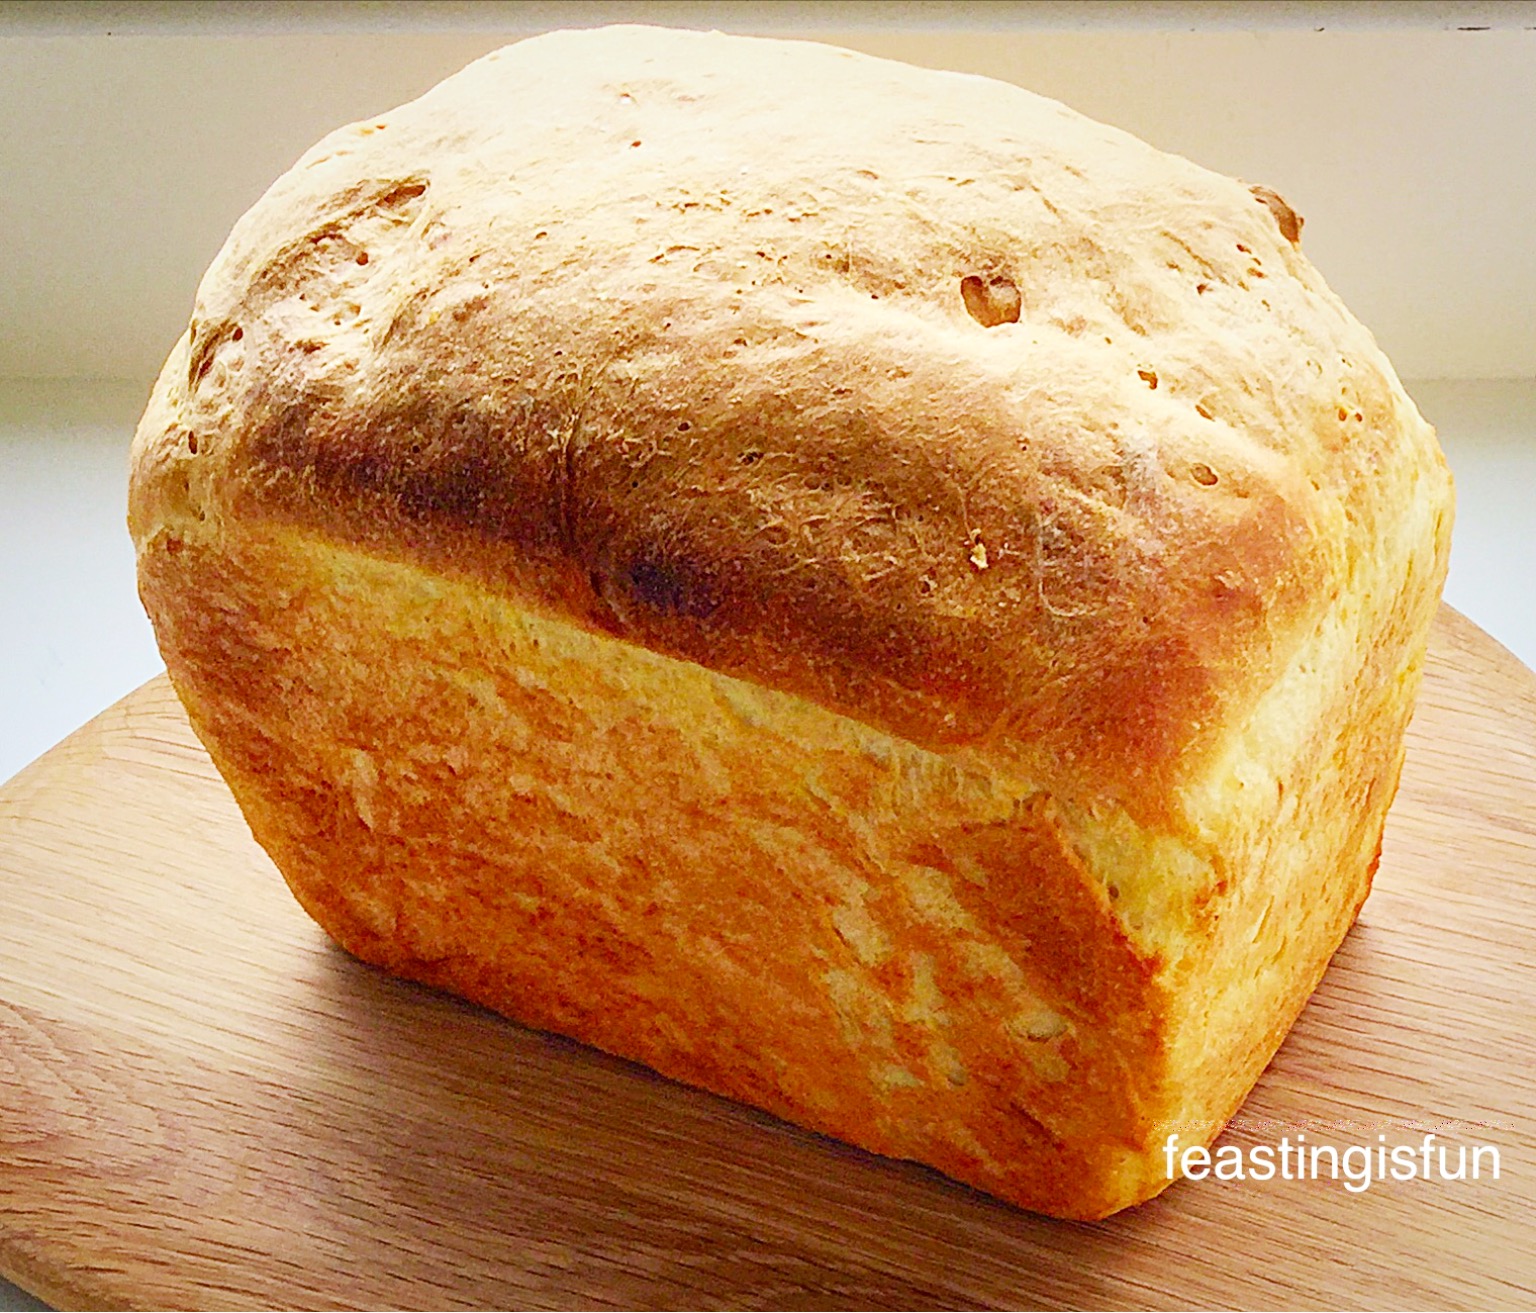
However your picture shows the loaf ready for the oven is risen well over the edge of the tin, implying that even after shaping it’s already got quite a lot of volume.
Am I losing to much volume in the shaping? Should I aim for double loaf size, even though it won’t be over the edge of the tin and hope there is some additional rise in the oven? Or should I aim for it to rise over the edge of the tin (like in your picture)
Hi Rich, thanks for your comment.
Firstly, I will make this loaf tomorrow and include a photo of the shaped dough in my blog post.
You simply need to allow the dough to double in size for the second rise and then it is ready for the oven.
Once in the oven it should rise even more (this is known as oven spring). The more the dough is proved before baking the less oven spring it will have.
I hope that helps? Please check back tomorrow and I’ll update the recipe, plus include details for scoring.
Thanks Sammie,
My bread looks more like your new picture.
I generally don’t get much oven spring but I think I’ve been over proving.
Rich
I’m glad to help. You may find that your bread rises more quickly when the weather’s warmer (as per my previous dough image). Also variations in yeast and flour may have an impact on how much the dough rises and oven spring, see my new notes on placing water on the oven base.
I’m fairly new to this bread baking business (thank you quarantine) and I’ve used this recipe the last few times and have been really happy with the results. So happy to make this my go-to recipe and thank you for sharing! However just today I felt the dough was a bit too tough from the get-go and without much kneading involved. Not dry… just stiff (which I would think is because of over kneading but I hadn’t really started). Do you think I should add more liquid or knead less than I already am? Any suggestion welcome!
Hi Maaham, as you knead, the bread dough should become more pliable and softer. There are various factors that can affect the dough; room temperature – if it’s cold the dough will be much stiffer and harder to work, also a change in flour (either a different brand, or same brand different batch) can affect how much water is needed to create a soft, pliable dough. As the dough was stiff at the start I would suggest a couple of things. Firstly, check that the yeast you are using is active and in date. Secondly, I recommend adding an extra couple of tablespoons (30ml) of room temperature water to the dough as you start to knead it, you can add more water (another 2-4 tablespoons) if the dough is still stiff and unworkable. Adding water will not harm the baked bread, it may take longer to knead the dough as it is likely to be sticky for longer at the beginning. I frequently add extra water if I find my dough is too stiff at the start.
I really hope these tips help. Please let me know how you get on? Sammie.
Hey Sammie thank you so much for your suggestions! The yeast was fine I think since the rise was pretty good during both proves. I think I shouldn’t have used a bit of all-purpose flour for experimenting (I definitely got a crunchier crust, but didn’t change much for the taste of the bread in my opinion). Something I changed and noticed greatly this time around was the temperature of the room! I remember that the aircon was blaring when I was making the last loaf and this time it was off. The bread was sticky, pliable and so much easier to knead this time around. Thank you for your help! I just bought a 1 lb pan so I halved the recipe for some baby bread. I’ll add the picture to your Pinterest post! Thanks again Sammie!
Hi Maaham, I’m pleased to have helped. Happy baking. Sammie.
OMG I have been making bread since lockdown so thanks to a local supplier I’ve made A LOT. This is by far the best yet. Light, fluffy crusty, I followed the recipe apart from because I hadn’t any honey I used a wee bit caster sugar instead.
1 tip I learned though is I warm my oven a wee bit (on 50 for 5 mins) so when I prove I put it in the oven ( after the fans gone off) with the door closed and it rises beautifully.
Thanks, it’s been passed on to all my friends.
Thank you so much for leaving such a glowing comment. Im so glad you are baking bread at home and you are having great results. I’ve added sugar as an alternative to honey to the recipe. Happy baking, Sammie.
Hi, mine keeps sinking. What am I doing wrong!
Hi Becky, without knowing at what stage your dough/bread is sinking, it’s hard to give you an answer.
If you follow the recipe given and the guideline times, your bread should not sink. The only answer I can give, with the lack of info given is that you are over proving your dough on the second prove. Please send me more details and I’ll try to help.
Can you translate to American measurements please. Thank you
Hi Pam, thank you for your request. I am currently testing and retesting the conversion I have. It’s so important in baking to get the quantities exact. As soon as I’m happy with the American measurements I will add them to the recipe. Meanwhile, you could always try an online converter.
Love it, lovely texture um
Thanks, glad you like it.
This is now my favourite bread recipe,I’ve made it so many times now. It’s delicious.
Thank you so much for your comment Ann-Marie. I’m so glad that you enjoy making your own bread. X
Just read the recipe and will make it tomorrow with a newly purchased 3lb loaf tin. You mention adding butter but there is no quantity for butter listed in the ingredients. Also, should you score the top with diagonal cuts before putting in the oven?
Thank you for your comment. I have updated the blog post and apologies for any confusion caused.
I’ve just discovered you whilst googling bread recipes for a 4lb tin. Do you think this recipe would work for a tin that large or would I need to increase the quantities?
Many thanks, Jane
Hi Jane, I too have a 4lb loaf tin. Follow the recipe for Large 3 Malts Sunflower Loaf, using strong white bread flour and you should have the perfect sized loaf. Xx
I just made my first ever loaf of bread using this recipe today and it turned out amazing!
I didn’t have a 3lb loaf tin so instead I used a deep cake tin (8” tin 4” deep).
Hi Lucie, congratulations on becoming a bread baker! Great improvisation using a cake tin. If you are able to buy a 3lb loaf tin I guarantee it will get lots of use! So glad you enjoyed the recipe and thank you for leaving a comment. Sammie x
Hi Sammie I am trying out your recipe won’t be long now before my kitchen has the aroma of fresh baked bread xx
Nothing beats the aroma of freshly baked bread. Or the taste!
Yum….your farmhouse white loaf sounds just how bread should be – rustic with a nice crust and soft and delicious inside! Thanks for sharing Sammie!
Thank you Liz. This loaf is delicious and I forgot to mention, perfect for dunking in soup! Sammie x